Tuesday, May 22, 2012

Crock Pot Tuesday ~ Chicken and Dumplings


Today is Tuesday, so that means it time for Crock Pot Tuesday! Really, I do not always have something cooking in my Crock Pot on Tuesday and Tuesday is not the only day I cook in my Crock Pot. It just seems that I  use the Crock Pot on Tuesdays more than any other day of the week.

I absolutely love Crock Pot cooking. Just fix it and forget about it! I also prefer to use recipes that do no require to cook the meat (or anything else for that matter) prior to putting in the Crock Pot. I just want to be able to dump and go!

Today we have Chicken and Dumplings cooking! Yum-mo!

My Grandmother made Chicken and Dumplings from scratch and that was always my very favorite. Actually my Grandmother lived next door to me growing up and just about anything she cooked was fantastic! I have often wished that I was locked in her kitchen and made to learn to cook like her! I am sure I wouldn't have gone for that back then, but now I wish I knew how to make so many of the things she used to cook! My Mom has been able to make the Chicken and Dumplings like my Grandmothers, but I have not tried yet.

This Crock pot version is not exactly my Grandmother's, but It is still quite good. My kids have come to love this and ask for it often. Micah told me recently that he wants it for his Birthday dinner for the rest of his life!

When I make this  I generally double the recipe. This recipe can also be found here.


Crock Pot Chicken and Dumplings

Ingredients
  • 4 skinless, boneless chicken breast halves
  • 2 tablespoons butter
  • 2 (10.75 ounce) cans condensed cream of chicken soup
  • 1 onion, finely diced
  • 2 (10 ounce) packages refrigerated biscuit dough, torn into pieces
Directions
  1. Place the chicken, butter, soup, and onion in a slow cooker, and fill with enough water to cover.
  2. Cover, and cook for 5 to 6 hours on High. About 30 minutes before serving, place the torn biscuit dough in the slow cooker. Cook until the dough is no longer raw in the center.                
*Note: When putting the biscuit dough into the Crock Pot make sure to push it down  into the broth a little. It usually takes more time than called for the dumplings to be done. Usually an hour or more.

**Note: When I make this I need to make more dumplings than fits into my Crock Pot so what I do is transfer some of the chicken and the broth to a pot on the stove and then add in the biscuit dough. This gives me more space for dumplings.


Pin It

Tuesday, May 1, 2012

Crock Pot Tuesday ~ White Chicken Chili

I absolutely love to cook in the Crock Pot. There is something about throwing it all together in the morning and cooking all day that brings a little bit of joy to my life! The best part is when 6pm rolls around, dinner is usually ready without too much effort. It also makes the house smell good all day long!

It seems as though Tuesday ends up being the day of the week that I use the Crock Pot the most. So, recently I have been referring to Tuesday as Crock Pot Tuesday.

 Today, I have White Chicken Chili in my Crock Pot. This has been one of our favorites around here for several years. I found this recipe in the Fix it And Forget It Cookbook, but I did change it up just a little. This recipe makes up a very large batch that does fill up my 6-7 quart Crock Pot.


White Chicken Chili  


Ingredients:
4-6 Whole Skinless Chicken Breasts cooked cut into chunks ( I boil mine) 
2 chopped onions
4 garlic cloves, minced
4 (4oz) cans chopped green chilies
2 (4 oz) cans of diced jalapeno peppers
4 tsp Ground Cumin
3 tsp Dried Oregano
1/2 tsp Cayenne Pepper
1 tsp Salt
6 ( 1 Pound ) Cans of Navy Beans, Undrained
1 Can of Chicken broth


Directions:
While Chicken is boiling, I mix everything into the Crock Pot except the Chicken Broth. When Chicken is ready I stir it in and then add the Chicken Broth. Cook on High for 4-6 hours.


I usually make up a batch of cornbread to serve along with it. Some of us stir in a little bit of shredded cheese into our chili. Some prefer Mozzarella and some use Colby Jack. We also enjoy a dollop of sour cream and some tortilla chips to dip in the chili.

While this would be perfect on a very cold winter evening, we also enjoy it the rest of the year as well. It is so easy to prepare and is very yummy!

Enjoy!
Pin It

Friday, September 9, 2011

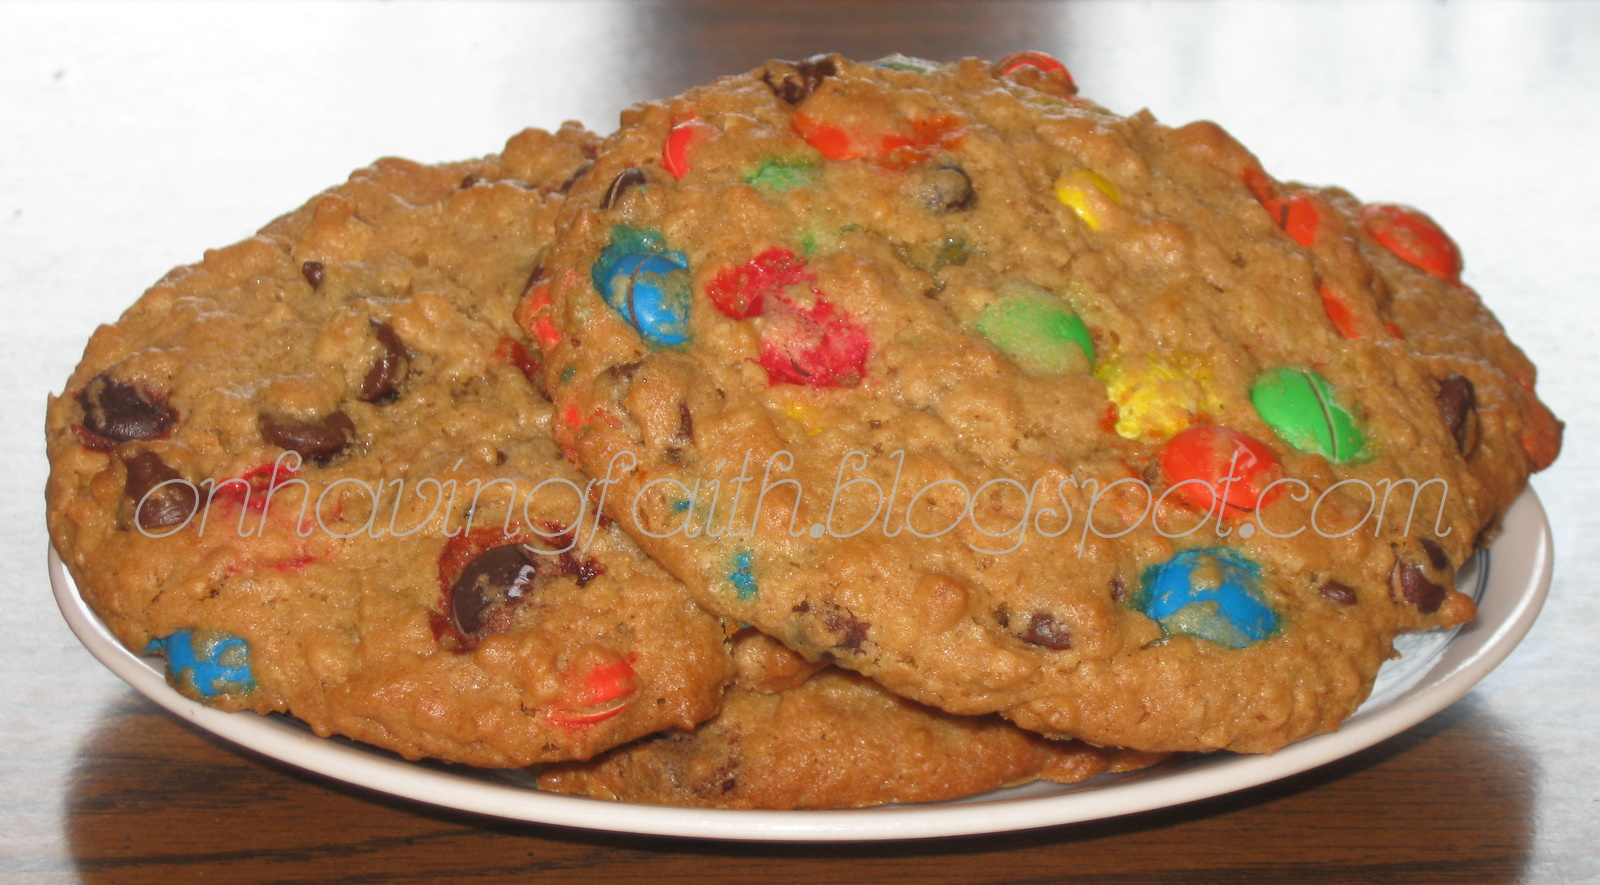
Monster Cookies

I recently stumbled upon this recipe and knew I was going to have to try it!  Most of you have probably heard of Monster Cookies before. Many years ago a friend gave me a recipe for Monster Cookies that were made from scratch. They were very yummy, but they seemed a bit time consuming! 

This recipe calls for using cookie mix that comes in a pouch plus a few more ingredients. Maybe cheating just a bit, but they were yummy and a whole lot quicker!  I made the recipe exactly as it is written except for I had some Reese's Pieces on hand, so I added them too! One person who reviewed the recipe mentioned adding peanut butter chips. That sounds yummy too! 


Ingredients: 

1 pouch (1 lb 1.5 oz) Betty Crocker chocolate chip cookie mix

1 pouch (1 lb 1.5 oz) Betty Crocker peanut butter cookie mix
1 1/2 cups quick-cooking oats

1 cup butter or margarine, softened
3 eggs

2 cups candy-coated milk chocolate candies


Directions:

Heat oven to 375°F. In large bowl, stir all ingredients except candies until soft dough forms. Stir in candies.

On ungreased cookie sheets, place about 1/4 cupfuls (very large cookies!) dough about 3 inches apart.

Bake 12 to 13 minutes or until light golden brown. Cool 2 minutes; remove from cookie sheets. Cool completely. Store in covered container at room temperature

*(To make 36 smaller cookies, place 2 heaping tablespoonfuls dough about 2 inches apart on ungreased cookie sheets. Bake 10 to 12 minutes)


  These cookies are completey low in calorie and fat, NOT! But oh so yummy! Pin It

Sunday, July 31, 2011

Lemonade Cake

I am always looking for a new recipe to try. Unfortunately for my waistline, I tend to be drawn to dessert recipes!  I happened upon this recipe the other day and just had to try it.

Back Many years ago a friend's mom would make a cake very similar to this for our church home group. I do not remember her putting icing on it though. I just remember the moist lemon cake that I just loved!

Lemonade seems to always go with Summer, so if you enjoy lemonade, you should try this yummy cake! I do recommend a light fluffy icing to go with it. When I made it, I used a buttercream frosting. I believe a lighter, fluffier icing would go better.

I found this recipe here and it originated from here.


Picture Credit


Ingredients:

1 box lemon or yellow cake mix
 
Water, vegetable oil and eggs called for on cake mix box


1 can (6 oz) frozen lemonade concentrate, thawed
 
3/4 cup powdered sugar
 
1 container Whipped fluffy white or fluffy lemon frosting ( I ended up using a buttercream frosting.)
 
Yellow colored sugar, if desired 


Directions:


1. Heat oven to 350°F (325°F for dark or nonstick pan). Make cake as directed on box for 13×9-inch pan. Cool 15 minutes.

2. Mix lemonade concentrate and powdered sugar. Pierce top of warm cake every 1/2 inch with long-tined fork, wiping fork occasionally to reduce sticking. Drizzle lemonade mixture evenly over top of cake. Run knife around sides of pan to loosen cake. Cover and refrigerate about 2 hours or until chilled.

3. Spread frosting over top of cake. Sprinkle with sugar. Store covered in refrigerator.


While this recipe is very delicious, it did not seem to measure up to my friend's mom's version. Pam, if you happen to be reading this, please send me your Mom's recipe!


Pin It

Monday, April 18, 2011

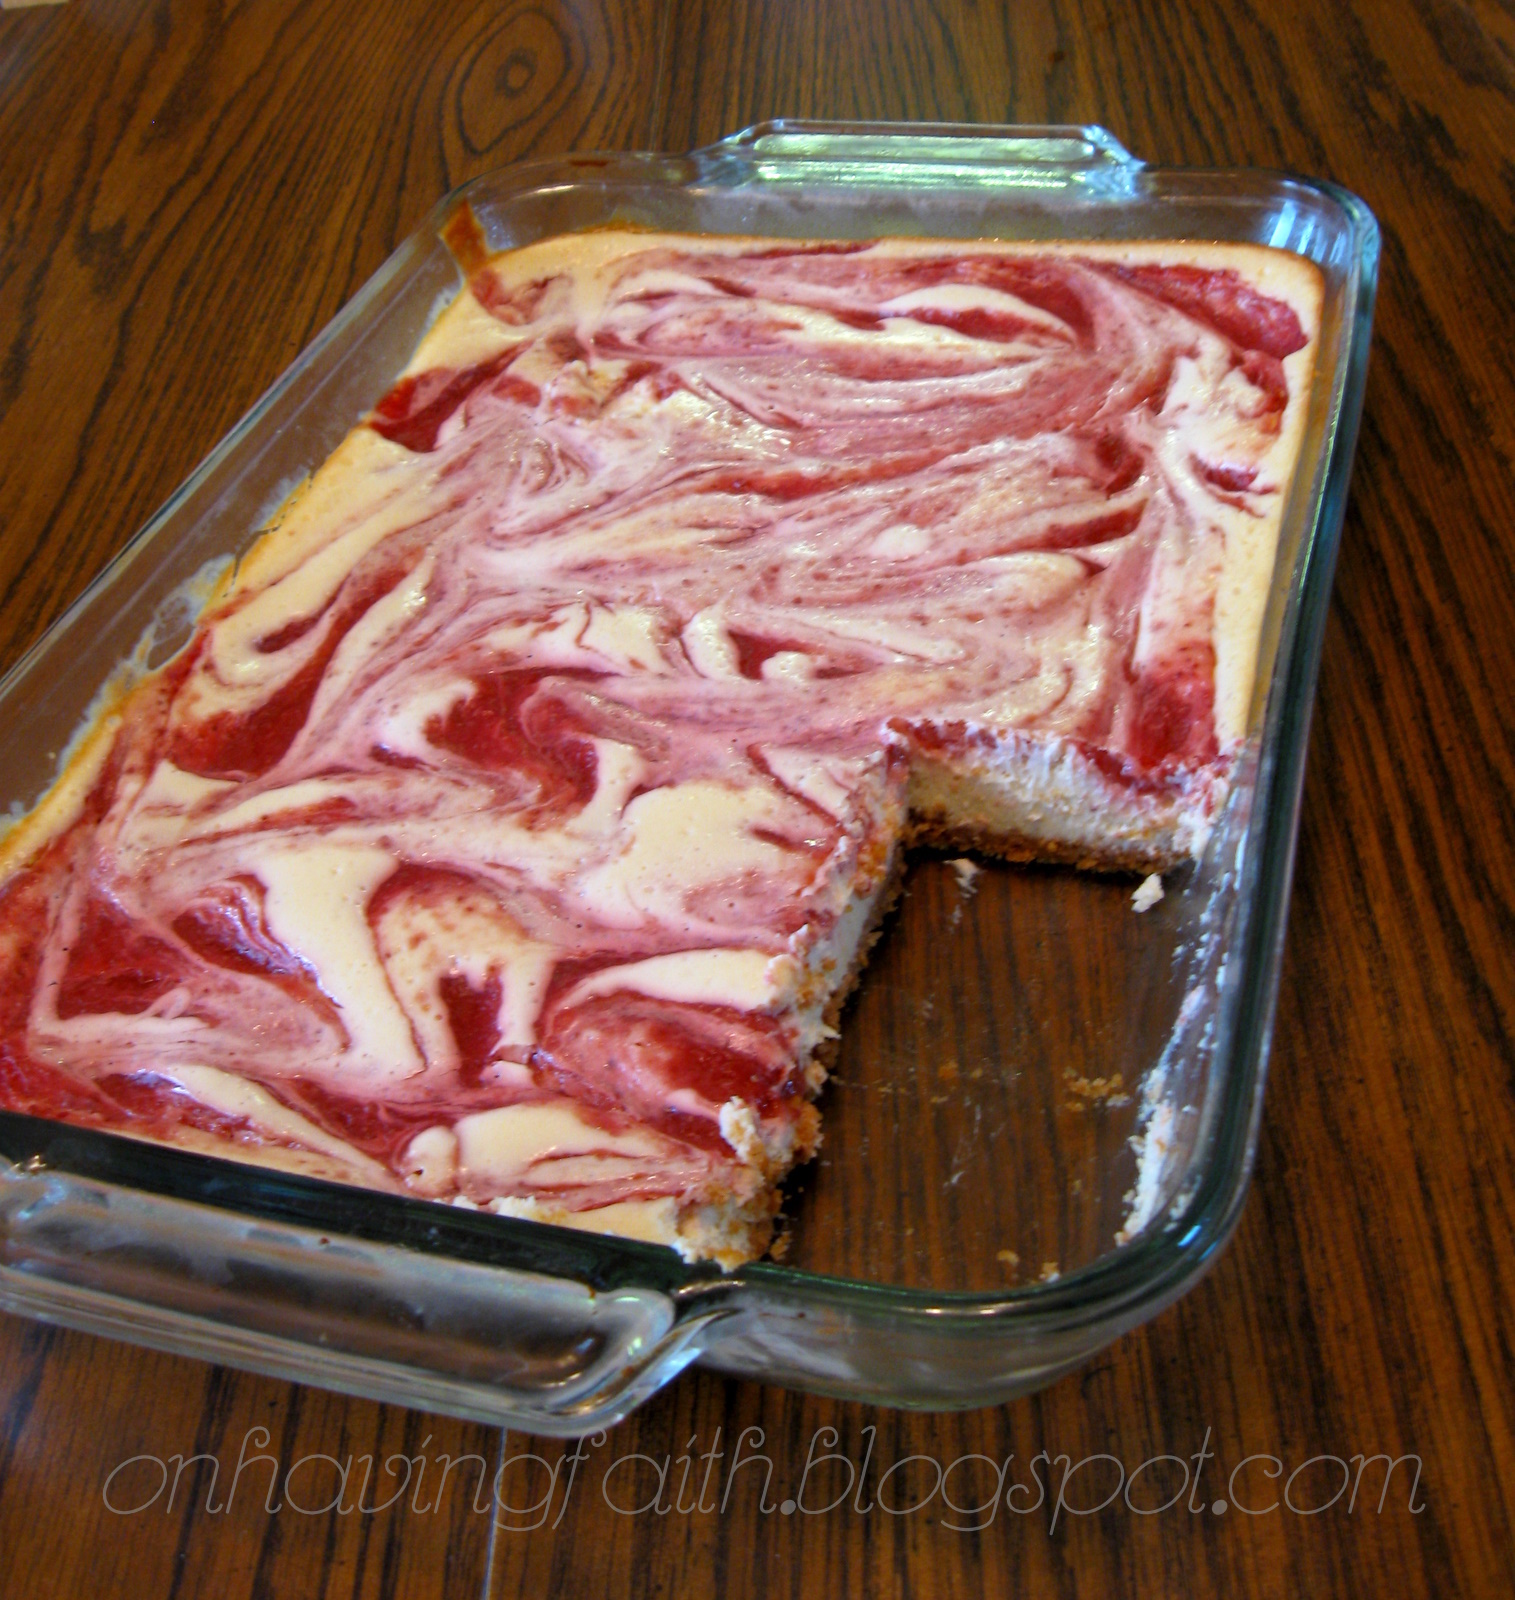
Strawberry Swirl Cheesecake Bars

Baking is something I have always enjoyed. I love to search for new recipes. Actually, I Love to read through cookbooks. A new cookbook would make an awesome gift for me, but no one seems to pay attention to that idea!

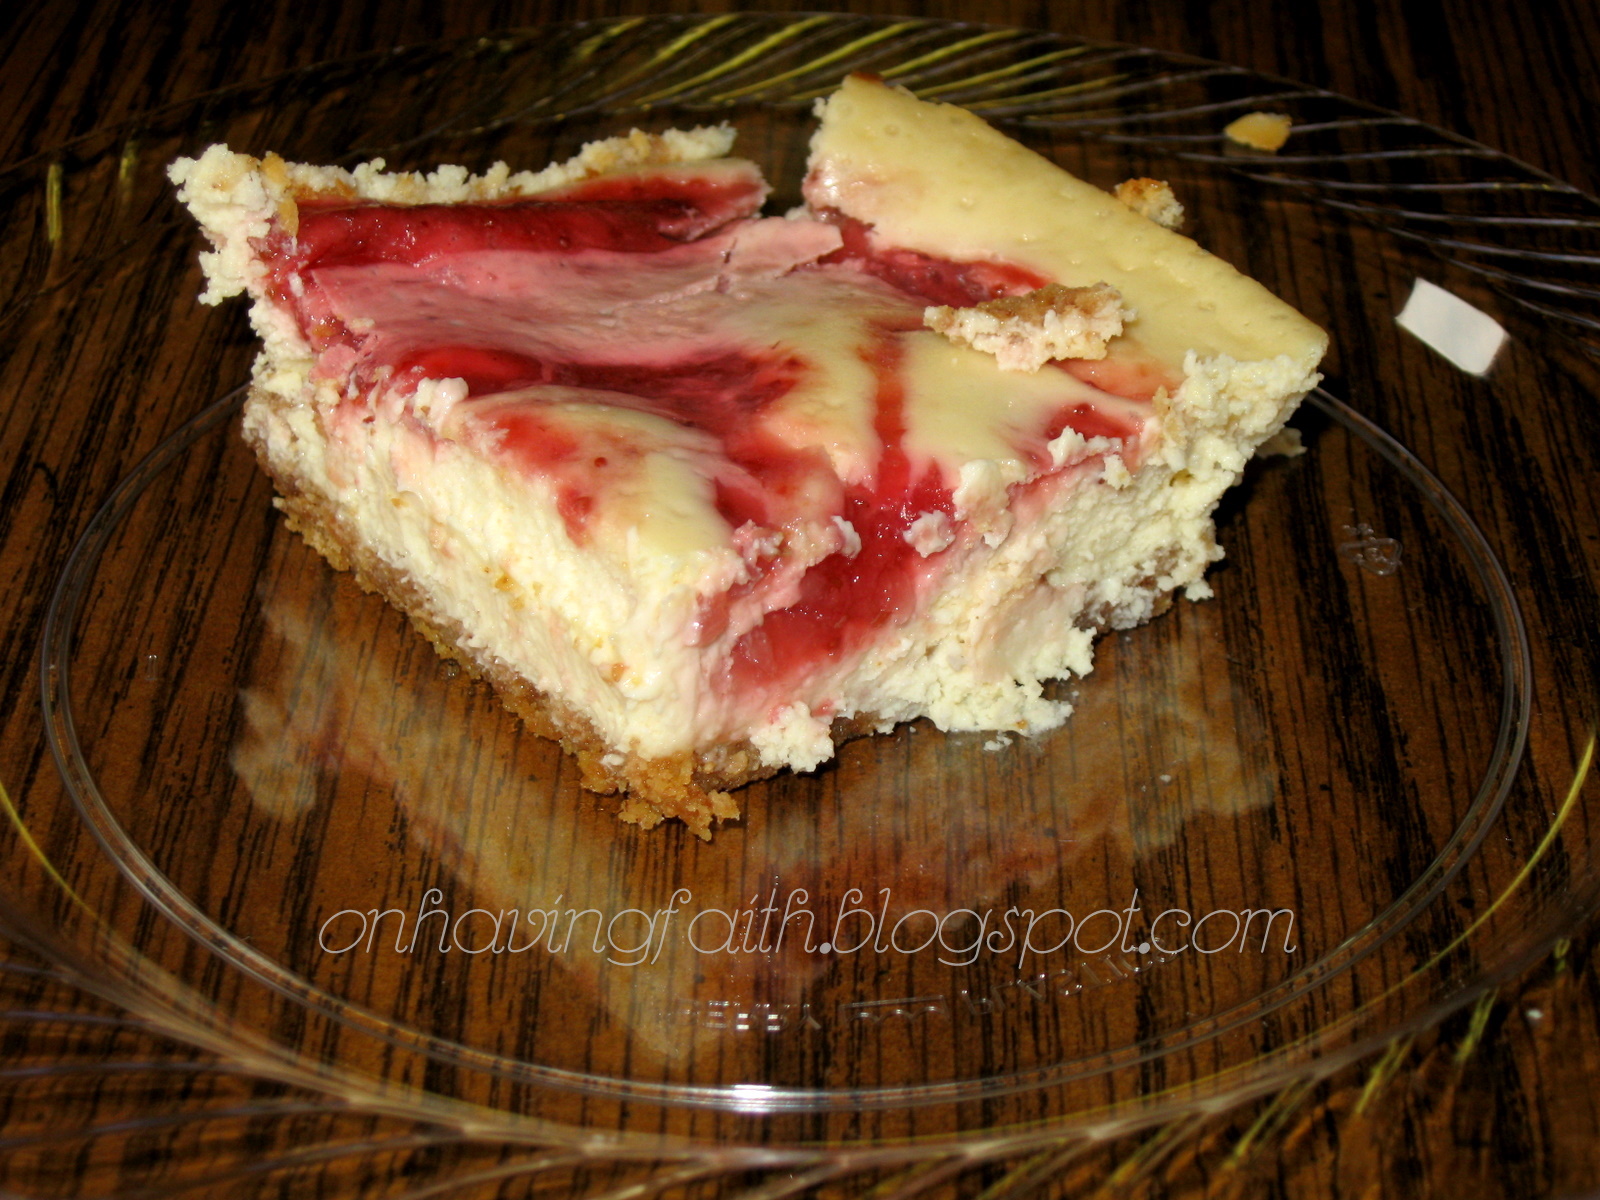
Anyway, the other day I needed to make a dessert for a function at church. I was looking for something I had never made before and preferably non-chocolate. I came across this recipe from Taste of Home that sounded yummy and easy enough to make. It is called Strawberry Swirl Cheesecake Bars. I love Cheesecake and I Love Strawberries, so this sounded like a wonderful mix!


This seemed to be a hit. The kids are always complaining that I make things for church and we never have any at home. Since the majority of us did not attend the function at church, I made a batch for home.


This is a recipe that I recommend if you enjoy Cheesecake and Strawberries. The only thing I changed was I added sugar to the strawberries. I did not add a lot of sugar and it really could have used a little more. I used unsweetened frozen strawberries, but probably would just use the sweetened kind the next time.


Strawberry Swirl Cheesecake Bars Recipe


No-Stick Cooking Spray

1 (10 oz.) pkg. frozen strawberries, thawed  ( I recommend adding sugar or use sweetened frozen strawberries)

1 tbsp. cornstarch

1 3/4 cups finely crushed cinnamon graham cracker crumbs

1/4 cup (4 tbsps.) butter, melted

2 (8 oz.) pkgs. cream cheese, softened

1 (14 oz.) can  Sweetened Condensed Milk

2 large eggs

1/3 cup lemon juice

1 tsp. vanilla extract


Directions

Heat oven to 350°F. Spray 13 x 9-inch baking pan with no-stick cooking spray.

Blend strawberries in blender container until smooth. Transfer to saucepan; add cornstarch. Cook and stir until thickened. Cool.

Combine graham cracker crumbs and butter in small bowl; press firmly into bottom of prepared pan.

Beat cream cheese until fluffy in large bowl. Gradually beat in sweetened condensed milk until smooth. Add eggs, lemon juice and vanilla; mix well. Pour over crust.

Drop strawberry mixture by spoonfuls over batter. Gently swirl with knife or spatula.
Bake 25 to 30 minutes or until center is set. Cool. Chill. Cut into bars. Yield: 2 to 3 dozen bars.


I found this recipe here.


Enjoy! Pin It

Friday, April 15, 2011

Caramel Cake

I am still alive! Well, at least I think I am! The kids keep us pretty busy and something is always going on! As I look at the calendar, the next few months seem like they will be busier than ever! Blogging could be pretty sporadic!

The past 2 weekends have been JBQ and TBQ State competitions. I am proud to report that our kids did really well. Our JBQ A-League team (which includes Anna and Sammy) was in a 3 way tie for second place. So it ends up that they were 4th in the gold division. That was good enough for them to go on to Regionals! Anna came in 3rd place individually! She is pretty competitive and she has worked really hard! I should also mention her teammate Tyler came in fourth! They did so well, and we are so proud of them!


The B-League team also did really well. It is an all girl team and they came in first place in the silver division. Micah and Luke are in C-League and they did awesome too! They came in first place in the gold division. Luke worked harder at the end, so he answered more questions than he has before! I believe it has help to build his confidence! He got 8th place individually and was so excited to get a trophy!

Our TBQ teams did awesome too! Rebekah's team came in first and Rebekah got First place individually! This is her Senior year, so what a wonderful way to end her TBQ career! She will be going to Regionals next month with her team. Victoria's team came in second place! So Awesome! They too, will be going to Regionals!

Matthew is on the Middle School Team and they came in First in their division. His Team will be going to Regionals as well!

So, as you can see, there are some of the things that are on our upcoming agenda, not to mention the possibility of Anna and Sammy's team, Rebekah's team, and Victoria's team advancing to Nationals! I will also have to be running our kids to practices every week for our Church's Musical. There are actually 2 different musicals for 2 different age groups. I will have 3 kids in one and 4 in the other. Their practices are on different nights, so it will be a lot of transporting going on. The performances are in August with each group having two performances each. I would also like to fit in a trip to Virginia so that I can visit my Mom and the rest of my extended family.

To add to all of that, Rebekah and Josh will be starting College in the Fall. We will have to help them get ready for that and do all the necessary preparations! I personally find having older kids a bit more challenging than the little ones!

Recently Hubby celebrated his Birthday. I made his cake this year. He pretty much said that he would like any cake except chocolate. I scoured through recipes and decided on a Caramel Cake. Looking through so many recipes on the Internet, I came to the conclusion that most of the recipes were of a yellow cake with a Caramel Frosting. So, I decided to cheat just a little!

I used a yellow cake mix and mixed it up according to the directions and then stirred in some melted butterscotch chips. Originally I made a layered cake, but evidently left the cakes in the pans too long or something. When I tried to take them out, they were completely stuck! I had sprayed the pans with PAM, so that was not the problem. In the process of trying to get them out of the pans, one of the layers broke into pieces.

Yeah, so I mixed up 2 cake mixes and stirred in some melted butterscotch chips and poured it into a large pan. I am not sure of the dimensions, but it is a lot bigger than a 13x9 pan. I thought that since it was such a large cake that I probably should double the recipe for the Frosting. Well, in all actuality it probably wasn't needed. The Frosting was sort of like fudge and in the middle it was at least as thick as the cake! It was really yummy and the kids did not complain about too much Frosting! I wish I had taken pictures after it was cut so that you could see how thick the icing was!


Happy Birthday Hubby!


Here is the Recipe for the Frosting!


Caramel Frosting From Scratch

2 sticks butter

2 cups light brown sugar

1/2 cup Pet's Evaporated Milk

1 tsp vanilla

4 cups powdered sugar


Melt butter and brown sugar and evaporated milk. Cook two minutes over medium heat (no longer than two minutes). Add vanilla. Remove immediately from heat. Add powdered sugar. Beat until smooth.. Will frost a three layer cake!


I found this recipe here along with a cake recipe.


Warning: It will give you a major sugar rush!


Have a Great Weekend Everyone! Pin It

Tuesday, December 21, 2010

Better Than Anything? Cake

Here is the fourth and final recipe from this Birthday Post.


We call it  Better Than Anything Cake, but it has been called a variety of names.  You can do a google search and find hundreds of different recipes for this cake. This is a very easy cake to make and pretty yummy too, However, I am not sure it lives up to its name!


 Here is the recipe I used. You can also find it here.


Better Than Anything Cake


Ingredients:

1 German chocolate cake mix ( I used a Dark Chocolate Cake Mix)

1 cup semisweet chocolate chips

1 can (14 oz.) sweetened condensed milk

caramel topping

12 ounces Cool Whip

3 heath bars, crushed ( I buy a bag of Heath Milk Chocolate Toffee bits that are located in the baking aisle near where they sell chocolate chips, not all stores carry these)


Directions:
Heat oven to 350 F. Grease and flour 9 x 13 inch pan. Prepare cake mix as directed on package; pour into prepared pan. After 10 minutes of baking, sprinkle with chocolate chips. Continue baking until cake is done.

While cake is still hot, poke holes in it with handle of wooden spoon. Pour sweetened condensed milk over cake; let cool. Top with caramel sauce, then whipped topping. Sprinkle with candy bars.


Here is Josh with the Better Than Anything Cake. I doubled the recipe and baked in a larger pan.


Now on to prepare for Jesus' Birthday! Pin It

Thursday, December 16, 2010

Chocolate Mint Layer Cake

The next recipe that I will share from this Birthday Post, is the Chocolate Mint Layer Cake. I originally made this cake back a few years ago for Josh's Birthday. The Recipe for the mint filling calls for green food coloring. I told Josh he could pick any color he wanted. Back then his favorite color was orange, so we had orange mint filling!  (A little strange I know!)

I cannot find a picture of Josh's cake, but here is Sammy's. Yellow is Sammy's favorite color, so I decorated his cake with yellow M&M's and the filling is what else .......  Yellow!  Sorry, I did not take a picture after cutting it, so you cannot see the filling. I cheated this time while making this cake, Instead of following the recipe for the cake part, I used a chocolate fudge boxed cake mix and then continued with the rest of the recipe. It turned out great!


Sammy


Chocolate Mint Layer Cake


Ingredients:


1/2 cup butter, softened

1-3/4 cups sugar

3 eggs

4 ounces unsweetened chocolate, melted and cooled

1 teaspoon Spice Island® Pure Vanilla Extract

3/4 cup milk

1/2 cup water

1-3/4 cups all-purpose flour

3/4 teaspoon baking soda

1/2 teaspoon salt

FILLING:


1 cup heavy whipping cream

3 tablespoons confectioners' sugar

1/8 teaspoon peppermint extract

3 to 4 drops green food coloring, optional (or color of your choice!)


ICING:

1 cup (6 ounces) semisweet chocolate chips

1/4 cup butter

1/3 cup evaporated milk

1 teaspoon Spice Island® Pure Vanilla Extract

1-1/2 cups confectioners' sugar


Directions:

Line two greased 9-in. round baking pans with waxed paper. Grease and flour the paper; set aside. In a large bowl, cream the butter and sugar until light and fluffy. Add the eggs, one at a time, beating well after each addition. Beat in chocolate and vanilla. Combine milk and water. combine the flour, baking soda and salt; add to creamed mixture alternately with milk mixture.

Pour into prepared pans. Bake at 350° for 24-28 minutes or until a toothpick comes out clean. Cool for 10 minutes before removing from pans to wire racks.

For filling, in a small bowl, beat the cream until it begins to thicken. Add confectioners' sugar and extract; beat until stiff peaks form. Beat in food coloring if desired. Place one cake layer on a serving plate; spread with filling. top with second cake.

For icing, in a microwave-safe bowl, melt chips and butter; stir until smooth. Cool slightly. Beat in evaporated milk and vanilla. Gradually beat in confectioners' sugar. Frost and decorate cake. Chill 2 hours before slicing. Yield: 12 servings

I found this recipe from Taste of Home and can be found here.

 
Here is their picture:

Picture Credit
Pin It

Saturday, December 11, 2010

Blueberry Pound Cake

The next Birthday Cake recipe I am going to share with you from this post is Blueberry Pound Cake. I originally found this recipe in the Cooking Light Magazine several years ago. I wrote down the recipe on an index card and eventually lost the magazine. I now see that this recipe was published in 1998.

My oldest son Jeremy has always been fond of this cake. He has requested it several times. He even learned to make it himself. He actually asked me to make it for his birthday last year, but I was rushed for time, so I talked him into me buying him a store-bought cake. I told him I would make it when life wasn't so busy. Time got away from me, so when I thought about it again, I could not find fresh blueberries. I never did make that cake.

Fast Forward to this year and we were out of town for his Birthday. His Birthday is in August and we finally coordinated our schedules for early November. Well, early November is not exactly the best time to find fresh blueberries! I decided to go ahead and use frozen. The frozen work really well too and this cake is light and delicious!


Blueberry Pound Cake


Ingredients:


2 cups granulated sugar

1/2 cup light butter
1/2 (8-ounce) block 1/3-less-fat cream cheese, softened (sometimes I use regular cream cheese)

3 large eggs

1 large egg white
3 cups all-purpose flour, divided

2 cups fresh or frozen blueberries

1 teaspoon baking powder

1/2 teaspoon baking soda

1/2 teaspoon salt

1 (8-ounce) carton lemon low-fat yogurt ( I use whatever lemon yogurt I can find)

2 teaspoons vanilla extract

Cooking spray

1/2 cup powdered sugar

4 teaspoons lemon juice

Directions:

Preheat oven to 350°.

Beat first 3 ingredients at medium speed of a mixer until well-blended (about 5 minutes).

 Add eggs and egg white, 1 at a time, beating well after each addition.

 Lightly spoon flour into dry measuring cups; level with a knife.

 Combine 2 tablespoons flour and blueberries in a small bowl, and toss well.

Combine remaining flour, baking powder, baking soda, and salt.

Add flour mixture to sugar mixture alternately with yogurt, beginning and ending with flour mixture.

 Fold in blueberry mixture and vanilla; pour cake batter into a 10-inch tube pan coated with cooking spray.

 Bake at 350° for 1 hour and 10 minutes or until a wooden pick inserted in center comes out clean.

Cool cake in pan 10 minutes; remove from pan. Combine powdered sugar and lemon juice in a small bowl; drizzle over warm cake. Cut with a serrated knife.

You can also find this recipe here.


The finished product


Pin It

Thursday, December 9, 2010

Banana Cake

I was asked if I was going to share the recipes from my recent  Birthday post.  I had planned on doing it, so here goes. I will do them one at a time.

I will start with The Banana Cake. This cake is usually requested at least once a year, if not more. Tim almost always asks for this one! 
This recipe comes from an old cookbook from the Church I grew up in. It was submitted by a dear woman who was a wonderful cook. I am quite thankful to have this recipe.

My Mom had a recipe from her Grandmother that she thought was the absolute best, but somewhere along the way she lost it. She says this recipe comes very close.


Banana Cake


Ingredients:

1/2 cup of shortening

1 1/2 cups of sugar

2 large eggs

2 cups of sifted flour

1/4 teaspoon of baking powder

3/4 teaspoon of baking soda

1/2 teaspoon of salt

1/4 cup of buttermilk

1 cup of mashed bananas ( I usually do a little more, it makes it a little more moist.)

1 teaspoon of vanilla


Directions:

Cream the shortening and sugar together until light and fluffy. Add the eggs one at a time and beat thoroughly after each one. Sift flour, baking powder, salt, and baking soda. Stir flour mixture in alternately with the milk and bananas. Add vanilla. Pour into two 9 inch greased layer pans or a 13x9 pan and bake 30-35 minutes in a 350 degree oven. Cool completely and frost with buttercream frosting.

Here is the recipe I use for Buttercream Frosting. It comes from the Domino Confectioners Sugar box.

Buttercream Frosting


Ingredients:
1 (1 -lb pkg) of Confectioner's Sugar ( approx. 3 3/4 cups)

1/2 cup of butter or margarine, softened

3 to 4 Tablespoons of milk

1 teaspoon of vanilla

Directions:

Combine all ingredients in a large bowl with mixer on low speed. Beat on medium speed 1-2 minutes until creamy. If desired, add more milk until frosting is spreading consistency. Makes enough to fill and frost a 2-layer cake, or a 13x9x2-inch sheet cake.


This Buttercream Frosting Recipe can also be found here.

  I do not have any great pictures of this cake, but here is what I have.


Tim and Naomi on his Birthday with the Banana Cake


The icing was a little runny. I put the cake in the fridge and you can see after sitting out for a while, it is starting to run again!
 

  This is a yummy, moist, cake. If you like bananas or banana bread, you will love this cake!


Pin It

Thursday, October 21, 2010

Delicious Pumpkin Bread

For some reason, I have been wanting to bake a lot, more recently. My family  has enjoyed it, but it sure isn't good for the diet!

One of my most recent endeavors was Delicious Pumpkin Bread. I love just about anything pumpkin, so this looked yummy! I was very pleased on how it turned out. It was quite moist and tasty!  Since Hubby and a few of the kids do not like pumpkin, I was able to enjoy this treat for several days! I did make some Banana Bread several days later just for Hubby, but it was gone quite quickly!

If you like Pumpkin, then you will probably enjoy this Delicious Pumpkin Bread. You can find the recipe here.

Delicious Pumpkin Bread

Ingredients:

5 eggs

1-1/4 cups canola oil

1 can (15 ounces) solid-pack pumpkin

2 cups all-purpose flour

2 cups sugar

2 packages (3 ounces each) cook-and-serve vanilla pudding mix

1 teaspoon baking soda

1 teaspoon ground cinnamon

1/2 teaspoon salt


Directions:

In a large bowl, beat the eggs. Add oil and pumpkin; beat until smooth. Combine remaining ingredients; gradually beat into pumpkin mixture.

Pour batter into five greased 5-3/4-in. x 3-in. x 2-in. loaf pans. Bake at 325° for 50-55 minutes or until a toothpick inserted near the center comes out clean. Cool for 10 minutes before removing from pans to wire racks to cool completely. Yield: 5 mini loaves (8 slices each) . Bread may also be baked in two greased 8-in. x 4-in. x 2-in. loaf pans for 75-80 minutes. (I did the two 8-in x 4-in. x2-in. loaf pans)


Fresh out of the oven and still in the pan.


Large slices that are so much cheaper than Starbucks and a lot more yummier!


I Definitely give it 2 thumbs up!


Pin It

Sunday, August 1, 2010

Crafty Crescent Lasagna

I am always looking for something new to try for dinner. It seems like we do the same things over and over again and it gets boring!

Back several years ago, we were living in a different house in a different state, and a neighbor made us dinner because we had just had a new baby!  We enjoyed the dinner and I begged asked her nicely for the recipe( actually several times). I never got that recipe from her, but over the years I remembered that dinner and would hope to find the recipe.

Recently I did a google search for it and I got this recipe. I think she must have used something different for the crust, but I am not sure. It is not exactly the same(at least from my memory), but it was still good. It seemed as though most of my family enjoyed it.


INGREDIENTS:

Meat Filling
  • 1/2 lb bulk pork sausage
  • 1/2 lb lean (at least 80%) ground beef
  • 3/4 cup chopped onions
  • 1 tablespoon dried parsley flakes
  • 1/2 teaspoon dried basil leaves
  • 1/2 teaspoon dried oregano leaves
  • 1 small clove garlic, finely chopped
  • Dash pepper
  • 1 can (6 oz) tomato paste

Cheese Filling
  • 1/4 cup grated Parmesan cheese
  • 1 cup small-curd cottage cheese
  •  1 egg
Crust

  • 2 cans (8 oz each) Pillsbury refrigerated crescent dinner rolls or 2 cans (8 oz each) Pillsbury Crescent Recipe Creations® refrigerated seamless dough sheet
  • 2 (7x4-inch) slices mozzarella cheese ( I used shredded mozzarella instead)
  • 1 tablespoon milk
  • 1 tablespoon sesame seed  
DIRECTIONS :


1. In 10-inch skillet, cook sausage and beef until thoroughly cooked and no longer pink, stirring frequently; drain. Stir in remaining meat filling ingredients; cook 5 minutes, stirring occasionally, until thoroughly heated.


2. Meanwhile, heat oven to 375°F. In small bowl, mix cheese filling ingredients. Unroll both cans of dough. Place dough rectangles side by side, on ungreased cookie sheet (if using crescent dough, firmly press edges and perforations to seal). Press to form 15x13-inch rectangle.


3. Spoon half of meat filling in 6-inch wide strip lengthwise down center of dough to within 1 inch of short sides. Spoon cheese filling over meat filling; spoon remaining meat filling evenly over cheese filling. Arrange mozzarella cheese slices over filling.


4. Fold short sides of dough 1 inch over filling. Fold long sides of dough tightly over filling, overlapping edges in center 1/4 inch; firmly pinch center seam and ends to seal. Brush with milk; sprinkle with sesame seed.


5. Bake 23 to 27 minutes or until deep golden brown.


I made two of these. Since some of the kids do not like Sesame Seeds, I made one of them without.  I will definitely make this again sometime!


Pin It

Sunday, July 25, 2010

Strawberry-Frosted Banana Brownies

One thing I have enjoyed is trying new recipes. I love cookbooks and could sit and read through one like most people would sit and read a novel. If anyone was ever wanting to give me a present and had no idea what to get, a new cookbook would be perfect!

I like to try recipes for dinner as well as desserts. The dinner recipes are more of a challenge because most of my family will not eat a dish with veggies added in. I love veggies so there are many recipes that look yummy to me but I know won't work out too well for my family.

Dessert recipes are my favorite. I guess one reason is I have a Huge sweet tooth! That works really well with my quest to cut sugar out of my diet! Of course the family is excited when I try a new dessert recipe.

I subscribe to a few sites that send out email newsletters with recipes. Yesterday I decided to try this recipe from  Betty Crocker. You can find the recipe here.


Strawberry-Frosted Banana Brownies


From Betty Crocker


Ingredients:


1 box Betty Crocker® fudge brownie mix

Water, vegetable oil and eggs as called for on brownie mix box

1 banana, mashed (about 1/2 cup)

1/2 cup fresh or frozen (thawed) strawberries

3 1/2 cups powdered sugar

1/2 cup butter or margarine, softened

1/2 teaspoon vanilla

Fresh sliced strawberries, if desired


Directions:

  1. Heat oven to 350° F (325° F for dark or nonstick pan). Grease or spray bottom of 13x9-inch pan.


2. Make brownie batter as directed on box; stir in bananas. Spread into pan. Bake 24 to 26 minutes or until toothpick inserted 2 inches from side of pan comes out almost clean. Cool completely.

3. In food processor, process strawberries until pureed. In medium bowl, beat powdered sugar, strawberries, butter and vanilla with electric mixer on low speed until smooth. Spread over cooled brownies. Garnish with strawberry slices, if desired.

When I make brownies I usually double the recipe and bake them in a pan that is larger than a 9x13 but not exactly double the size either. I do not know the size of the pan, but it is a blue lasagna pan I got from Pampered Chef many years ago. I absolutely love this pan and wish I could find another like just like it!

Anyway, I doubled this recipe also and baked it in my blue pan. I actually used the Pillsbury brand brownie mix!(shame on me, I know!) I stock up on those because Walmart will have them on sale for a dollar. Another thing I do is add chocolate chips to my brownies. I do a half cup per box of brownie mix.  So I added a cup to this recipe since I doubled it!

I served  the brownies with sliced strawberries and drizzled chocolate syrup on top. I wanted to add a scoop of vanilla ice cream, but we did not have enough for everyone. I should have planned ahead!


The flavor was very yummy! I like my brownies gooey, but these were a little more cake like. I wonder if making this with cake mix would  would turn out well?

Strawberries and Bananas are some of my favorites and the pureed strawberries in the icing was very yummy! I give this recipe a thumbs up! Pin It

Friday, June 25, 2010

Double Chocolate Layer Cake

My first daughter, and fourth child, Rebekah, just recently turned 17! Wow! Where does the time go?

The day she was born I was on cloud nine! Finally a girl after having three boys! She wore a lot of pink and headbands. I even had her ears pierced when she was 9 months old. I did not want anyone to ever mistake her for a boy! Believe it or not, I still had an older man call her a boy!


Rebekah is now a beautiful, 17 year old, young woman, inside and out! She is very hard working. She will be a senior next year and also is in TBQ (Teen Bible Quiz) and studies very hard! Her team is going to the National Competition soon! She works at Chick-fil-A to earn money for college and maybe a car. I am so proud of all her hard work, but I am especially proud of her dedication to the Lord and living her life for Him! 

Rebekah with Anna 


Happy Birthday Rebekah!


I usually order a cake from Walmart for most of the Birthdays around here. As the children have gotten older they seem to appreciate a home made cake a bit more.  Rebekah wanted a special chocolate cake, so I found this recipe.  I decided to make a white cream filling to go in the middle instead, so there would not be too much chocolate, (if there is such a thing!).

Well, things did not go as planned! About 20 minutes into baking, Luke comes in and asks "what is that horrible smell"? Chocolate Cake Baking is not supposed to smell horrible!

One minor detail that I overlooked is that I was supposed to put the batter into two 10 inch pans and not 9 inch pans. The batter was overflowing all over the oven! It was burning on the burners. Yikes!


Well, I decided to let it keep baking and see if I could salvage anything. It seemed a bit crispy on top. I decided to put in an emergency call to Leigh, Jeremy's girlfriend. She works at the Bakery at Walmart and is an amazing cake decorator. She made a beautiful cake for Rebekah.


Rebekah and Anna being very silly!


I eventually made the icing and the cream center and put the cake together.  It was falling apart a bit, and crumbs were everywhere when I put the icing on. It was a little sorry looking, but it tasted amazing!


This is their version.


Mine


Yummo!

 I will have to try it again using the right size pans! This cake was very yummy and the Chocolate Ganache Icing is almost like eating Fudge! We really enjoyed the white cream center to break it up a bit!


Have An Awesome Weekend!


Pin It

Tuesday, August 18, 2009

MckLinky Blog Hop ~ Strawberry Pretzel Jello

This is a recipe that I received originally from my cousin several years ago. I had not made this in a few years but I was reintroduced to it recently by a friend from church. She brings it to most potluck dinners and it is usually gone really fast. I try to get some of this before any other food because it is so good and I want to make sure I can get some!

The only difference in my cousin's recipe and my friend's recipe is the first layer. My cousin uses 2 cups of pretzels and my friend's uses 1 cup of pretzels and 1 cup of pecans. I borrowed this picture to show you what it looks like. It is a pretty dessert and oh so yummy! I need to start taking pictures of the food I prepare in case I want to share the recipe. Anyway, Enjoy!


Strawberry Pretzel Jello


First Layer:

1 Cup of Crushed Pretzels

1 Cup of Finely Crushed Pecans

3 Tablespoons of Sugar

1 Stick of Butter (melted)

Combine together and press into the bottom of a 9x13 pan. Bake for 10 minutes at 350 degrees. Cool completely then add second layer.


Second Layer:

1 (8 Ounce) Package of Cream Cheese (room temperature)

1 Cup of Powdered Sugar

8 Ounces of Cool Whip

Cream together the cream cheese and powdered sugar then stir in the cool whip.


Third Layer:

2 (10 Ounce) Packages of Sweetened Frozen Strawberries (thawed)

1 (6 Ounce) Package of Strawberry Jello

2 Cups of Boiling Water

Dissolve the jello in the boiling water. Stir in the Strawberries. Put in Refrigerator until partially set then add on top of second layer. Refrigerate 4 hours or overnight.


MckLinky Blog Hop


Blessings, Pin It

Tuesday, July 21, 2009

MckLinky Blog Hop ~ Chocolate Chip Cookie Dough Brownies

Today on the McLinky blog hop we are sharing one of our favorite recipes. This recipe became one of my favorites recently. A friend shared it on Facebook and she got it from Bakerella. It originally came from Betty Crocker. It is so easy to prepare. It calls for using canned icing, but I like to make the chocolate ganache that Bakarella mentions. Be prepared for Yummy Chocolatey Goodness!


Chocolate Chip Cookie Dough Brownies


1 Box Betty Crocker Original Supreme brownie mix (with chocolate syrup pouch)

1/3 cup vegetable oil

1/4 cup water

2 eggs

1 pouch (1 lb 1.5 oz) Betty Crocker® chocolate chip cookie mix

1/2 cup butter or margarine, softened

1 egg

1 container Betty Crocker® Rich & Creamy chocolate frosting


1. Heat oven to 350ºF. Spray bottom only of 13x9-inch pan with cooking spray, or grease with shortening. Make brownie mix as directed on box, using oil, water and 2 eggs. Spread in pan.

2. Make cookie mix as directed on pouch, using butter and 1 egg. Drop dough by rounded tablespoonfuls evenly onto brownie batter; press down lightly.

3. Bake 35 to 40 minutes or until toothpick inserted 2 inches from side of pan comes out almost clean. Cool on cooling rack 30 minutes. Frost with frosting. For brownies, cut into 8 rows by 6 rows.


Chocolate Ganache

12 oz. semi-sweet chocolate morsels

3/4 cup heavy whipping cream

6 Tbsp butter


In a small saucepan, heat cream and butter until just before the boiling stage.

Pour over the chocolate morsels.

Let stand about 20 seconds and stir until smooth.

Pour over brownies and let set before cutting.


MckLinky Blog Hop
Pin It